April 19, 2024

10 Best Linux Distributions for Xfce Desktop

A fresh list of the best Linux distributions which offer lightweight Xfce desktop environments.

Xfce is a lightweight desktop environment focusing on speed, performance, and resource efficiency. It offers a clean and intuitive user interface without compromising functionality. It features the legacy icon and menu-driven user interface, which is time-tested for productivity. In addition, Xfce also allows users to personalize it according to their preferences.

Many Linux distributions feature Xfce as their flagship offering with various tweaks and customizations. If you love Xfce and want to adopt it for your daily driver, you may check out the below list of distributions.

The order is casually based on our recommendation and the freshness of the respective distros.

Best Linux distributions with Xfce desktop

Debian with Xfce

Debian Linux, known for its stability and reliability, offers the default desktop environment as Xfce. When you install the Debian desktop ISO, it installs Xfce if you don’t choose anything particular.

This powerful combination of Debian and Xfce offers stability, security, and a vast software repository, making it excellent for all user bases. Whether you’re seeking a reliable desktop operating system or a stable platform for your server, Debian with Xfce provides a user-friendly experience that can be tailored to suit your specific needs.

Debian 12 Bookworm Desktop (Xfce)

If you don’t like Ubuntu but want to be in “apt” ecosystem with Xfce, you should consider Debian Linux with Xfce. It would be a perfect combination for productive and daily running distribution. Finally, you get to experience vanilla Xfce with this variant.

You can download the Debian Xfce ISO file from the below page.

Linux Mint Xfce edition

If you are a Linux Mint fan and want an Xfce desktop with it, then you should try its Xfce flavour. Although Mint’s flagship is the Cinnamon desktop, but Xfce is equally good.

Linux Mint Xfce edition brings a lot of cool Mint apps (Xapps), making the Xfce desktop more productive for you. The built-in customizations and themes also give a better look than the default Xfce feel.

Linux Mint with Xfce desktop

In addition, you enjoy the advantage of seamless system updates, version upgrades and many system-level actions with just a few clicks. Linux Mint Xfce Edition provides a seamless and enjoyable computing experience overall and is probably the most stable and easy-to-use Xfce distro.

You can download Linux Mint Xfce ISO from the below link.

MX Linux

MX Linux is a popular and probably the most happening emerging distro, which got lots of users’ attention because of its versatility and simplicity. It is based on the Debian stable version and features a customized Xfce desktop.

At the core, MX Linux is free from Systemd. Hence you get a superfast distro that works in much older hardware with ease. MX Linux also features MX Tools to simplify various tasks which you want to perform on a desktop. These tools cover a range of functions, including system management, hardware setup, and package management, empowering users to customize their experience effortlessly.

MX Linux 21.3 running Xfce 4.18

Here are some key reasons why MX Linux is one of the worthy candidates in this list:

  • Based on the Debian stable version
  • Xfce desktop environment with option as Fluxbox
  • Systemd free
  • Excellent performance and stability
  • Access to a vast software repository
  • MX Tools for easy customization

Fedora Xfce Edition

If you are looking for Xfce with Fedora as the base, then you have limited options. One of the options is Fedora Xfce flavour which brings the latest packages and upgrades. Fedora Xfce usually offers the latest version of the Xfce desktop twice a year. In addition, Fedora Linux brings the latest tech upgrades and packages, making it the best choice for Xfce-based distribution.

Xfce in Fedora Linux

The Xfce desktop in Fedora Linux is the stock version without any customization. Hence, you have a clean slate to customize Xfce desktop as per your taste and need. Furthermore, Fedora Linux brings an extensive software repository, offering a wide range of applications, libraries, and development tools.

You can download the Fedora Xfce edition from the below page.

Xubuntu

Xubuntu is a Linux distribution that integrates the popular Xfce desktop environment with the Ubuntu operating system. It offers users a lightweight and efficient computing experience with the familiar Ubuntu ecosystem. Xubuntu’s emphasis on the Xfce desktop environment allows for a fast and responsive user interface while conserving system resources.

Xubuntu 23.04 Desktop

However, Xubuntu follows Ubuntu’s underlying packages, which include Snap and other Ubuntu desktop applications. If you are OK with those, then Xubuntu is an excellent choice for a stable Xfce-based distro.

You can download Xubuntu from the below page.

EndeavourOS

It’s the first Xfce-based distribution based on Arch Linux in this list. Three years back, a small team of contributors started EndeavourOS to continue the discontinued Antergos project. And since then, EndeavourOS has become popular because of its simplicity of installation, user experience and features.

Although several other desktops are available, EndeavourOS comes with the default Xfce desktop environment. The Xfce desktop is a little customized, and you get almost vanilla Xfce with Arch Linux based on this distro.

EndeavourOS with Xfce desktop

If you ever tried EndeavourOS, you must have “felt” how “easy” things are to perform on a desktop for the end user, being an Arch distro. The motto of this distro is to be a “general purpose” Arch Linux distribution for the masses, discarding the Arch Linux installation fear for new users and the superiority of using Arch.

It’s the best among other distros which offer Xfce with Arch Linux. You can download EndeavourOS from the below page.

Linux Lite

Linux Lite 6.0, AKA Linux Lite OS, is based on Ubuntu and follows its LTS (Long Term Support) lifecycle. That means you get a similar release schedule and security updates for five years following Ubuntu Linux. The lightweight desktop environment – Xfce is its primary and only desktop. Linux Lite OS primarily focuses on Windows users who want to kick-start their Linux journey. Hence, you may consider it a “bridging” Linux distro.

Linux Lite 6 Xfce Desktop

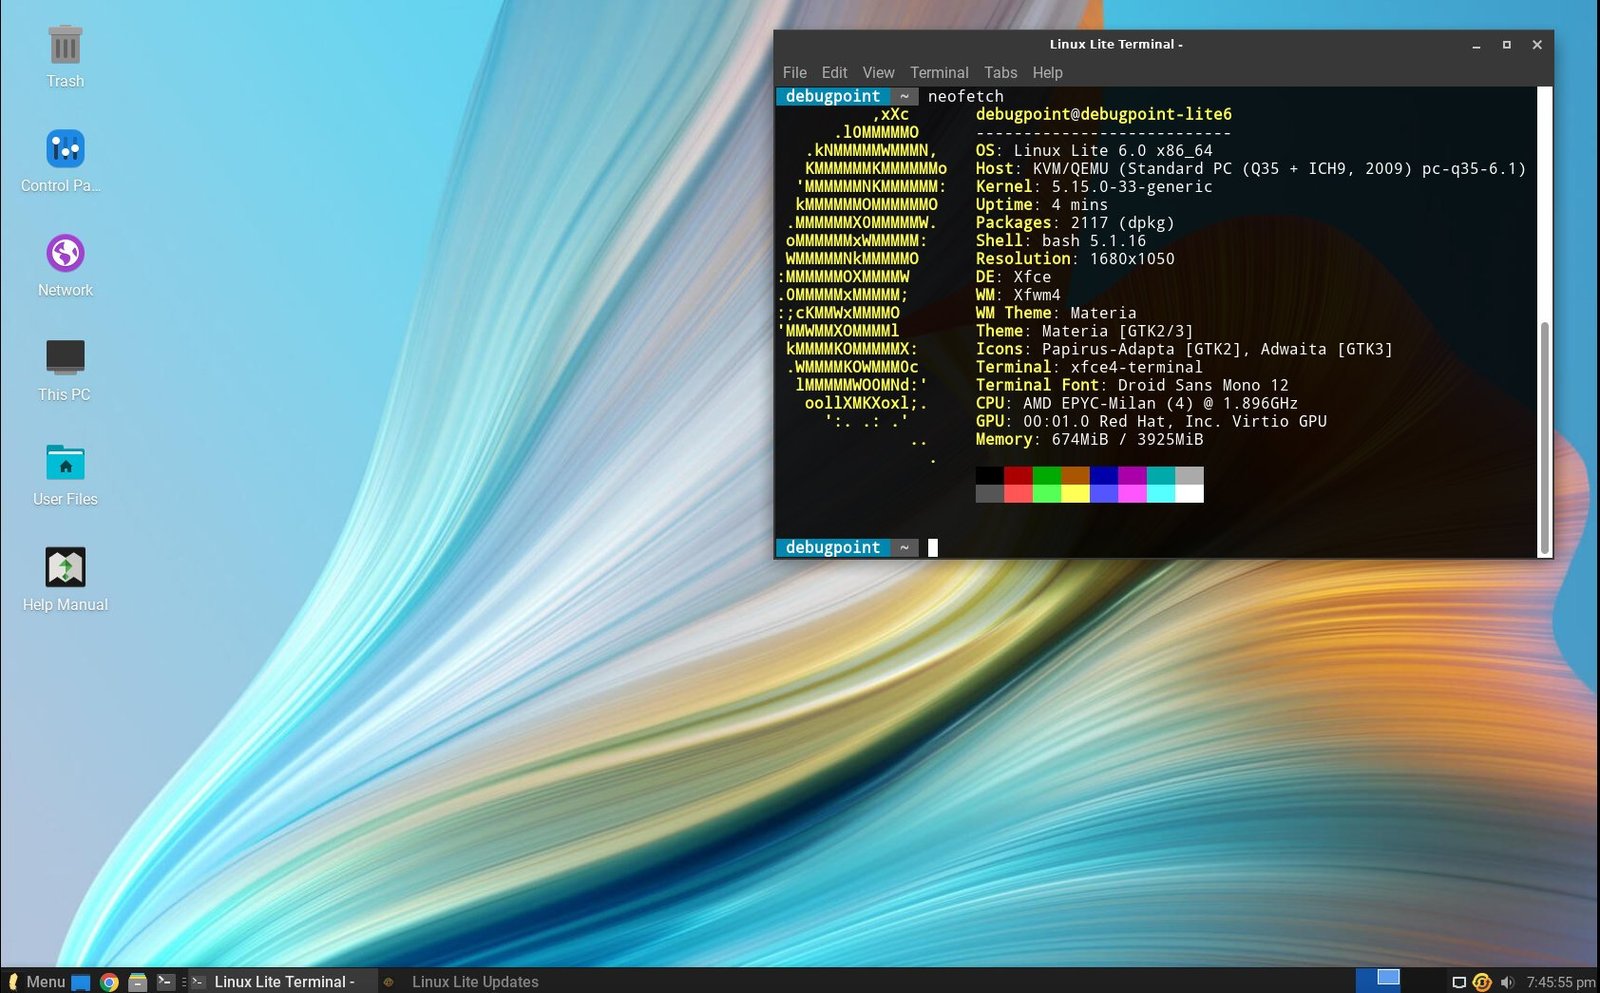
The Xfce desktop it offers is a little customized with themes, wallpapers and fonts. However, it’s another Ubuntu-derived distro with Xfce. You may give it a try.

You can also read about its performance and other aspects in the Linux Lite review.

Manjaro Xfce

Manjaro Linux is a famous and time-tested distribution which brings Arch Linux to the masses. It is well designed to provide a wrapper to the “Arch Linux is difficult” myth. In addition, once you start using it, you wouldn’t feel it is an Arch Linux. It may feel like a Debian-based or a Fedora-based distro.

Although it offers other desktop environments like KDE Plasma, its Xfce variant is also well-built with an underlying Arch Linux core. If you need another alternative Arch Linux-based distro with Xfce, you can try it.

You can learn more about this distro in several reviews which I published.

Manjaro Linux 21.3 GNOME Desktop

Peppermint OS

Next on the list is Peppermint OS, a Debian-stable-based distro that’s ideal for daily use. It includes pre-installed apps to help you get started and has a customized Xfce desktop environment. Previously, Peppermint OS used LXDE but recently made the switch to Xfce.

Peppermint 2022-02-02 Desktop

Other than the Debian base, Peppermint OS features two key applications. The Peppermint Welcome app provides new users with a basic overview of the distribution. The other app, Peppermint Hub, offers shortcuts for managing your system, such as changing themes and downloading software from the repository. If you are new to Peppermint OS, Peppermint Hub can handle most system management tasks from one convenient location.

You can give it a try, but the Xfce desktop experience would be the same as the first one on this list.

Kali Linux

Kali Linux, a well-known distro in the cyber security industry, is based on the Debian testing branch and is a must-have for this list. Although it is for a segment but the default Xfce desktop makes it another candidate in this list.

It is equipped with a variety of specialized tools for penetration testing, vulnerability assessment, and digital forensics. These tools include password cracking, network scanning, and wireless attacks, making it the ideal solution for assessing and securing your systems.

Kali Linux with Xfce Desktop Environment

The Xfce desktop environment is heavily customized, which makes it one of the great-looking distributions for everyone. However, it is targeted to specialized use cases. Hence you should only use Kali for those functions.

Which is the best for you?

Well, that depends on your taste and use case. If you are not sure, I would recommend going ahead with Linux Mint Xfce or MX Linux. They should fit for all purposes.

If you have a specific need for Fedora or Arch Linux base, then try Fedora Xfce or EndeavourOS.

And the rest of them might be good for specific use cases which require Ubuntu or Debian-base.

Conclusion

In conclusion, we looked at several excellent Linux distributions which are optimized for the Xfce desktop environment. Whether you are a beginner or an advanced user, these distributions provide a lightweight, efficient, and customizable platform for your computing needs. Each distribution offers unique features and advantages.

I hope you get to find out your favourite Xfce-based distro.

Source: https://www.debugpoint.com/best-xfce-distributions/#


Don't like your Linux desktop? Here's how to install an alternative

Written by Jack Wallen, Contributing Writer, April 17, 2024 at 12:27 p.m. PT

If you're not happy with the desktop environment your chosen distribution uses, you have plenty of options available to you. Find out how easy it can be to install here.

Linux is all about choice. From my earliest experiences with the OS, this has been the case. If you're coming from Windows, you're probably accustomed to being able to switch your web browser, office suite, and other applications. What you can't do on Windows is change the desktop environment. The same thing holds true for MacOS.


But with Linux, there's always a choice from the top down, including the desktop environment. In the past, I've used a single distribution with multiple desktop environments to choose from: GNOME, KDE Plasma, Pantheon, Enlightenment… the list goes on and on.

Also: The first 5 Linux commands every new user should learn

If you find yourself unhappy with the desktop environment installed on your current distribution, never fear because your package manager is here to help you out.

Before we dive into this, know that I'm not going to cover every desktop environment for every distribution. The aim here is to give you a general idea of how it's done. You can then take it from there and piece together the combination you want. 

With that said, I'll demonstrate the process on two different distributions: Ubuntu and Fedora, which means we're dealing with the apt and dnf package managers. What's interesting to some (and possibly frustrating to others) is that some desktop environments can be installed via your distribution's GUI app store, while others have to be installed via the command line. Because of that, we're going to stick with the command line. The good news is that the process will result in a successful installation.

And with that, let's install.

Let's say your distribution ships with KDE Plasma, and you'd rather use the modern take on minimalism, GNOME. If your distribution is Ubuntu (22.04 LTS and earlier), open the terminal window and install it with: 

sudo apt-get install vanilla-gnome-desktop vanilla-gnome-default-settings

The reason why we use vanilla-gnome is because the Ubuntu default desktop is based on GNOME, with several tweaks.

If your distribution is Fedora, the process for installing GNOME is as simple as the command:

sudo dnf group install gnome

The above command will install GNOME and all of its included applications (such as Software, Maps, Weather, etc.).

Once you've installed GNOME, restart your machine and you should see the GNOME option in your login screen.

Next, we go to the beautiful KDE Plasma desktop, which might remind you a bit of Windows 10 or 11 but with far more configuration options (and without the Windows bit holding you back). On an Ubuntu desktop machine, you can install KDE Plasma, thanks to Kubuntu (which is the official KDE Plasma spin of Ubuntu) with the command:

sudo apt-get install kubuntu-desktop

If your distribution is Fedora, the command would be:

sudo dnf install @kde-desktop

Budgie is one of my favorite desktops because it offers a great ratio of modernity and useability. It's beautiful and simple. 

To install Budgie on Ubuntu, the command would be:

sudo apt-get install ubuntu-budgie-desktop

On Fedora, you have to issue a few commands. First, you must enable the necessary repository with:

sudo dnf copr enable stenstorp/budgie

Next, install Budgie with:

sudo dnf install budgie-desktop

You can also install a number of recommended packages with:

sudo dnf install nautilus gnome-terminal gnome-system-monitor arc-theme arc-icon-theme gedit budgie-extras

If you're looking for simplicity at its best, give Cinnamon a try. On Ubuntu, the installation of this desktop is as simple as:

sudo apt-get install cinnamon

On Fedora, the command is:

sudo dnf group install cinnamon

Deepin has long been one of the most beautiful desktops on the Linux market. To install Deepin on Ubuntu, you must first add the necessary repository with:

sudo add-apt-repository ppa:ubuntudde-dev/stable

Next, install Deepin with:

sudo apt-get install ubuntudde-dde

On Fedora, you only need to run a single command:

sudo dnf group install "Deepin Desktop"

Xfce is a powerhouse of configuration options and can be made to look and behave exactly as you need/want. 

Xfce on Ubuntu is made possible via Xubuntu (an official spin) and can be installed with the command:

sudo apt-get install xubuntu-desktop

On Fedora, the command to install Xfce is:

sudo dnf group install xfce

And there you have it. 

Because you're using Linux, you don't have to settle for the desktop you were given by the distribution you chose. And if the desktop environment you want to try isn't listed above, you should be able to figure out how to get started installing the one you want. 

Also: Dynebolic is a portable Linux distribution that can be used without installation

And don't forget, you're not just limited to one or two desktop environments. You can install as many as you need and switch between them on a whim. Not every desktop environment can be installed on every distribution, though, and some desktop environments might conflict with others, so make sure to install with care.

Source: https://www.zdnet.com/article/dont-like-your-linux-desktop-heres-how-to-install-an-alternative/

Written by Jack Wallen, Contributing Writer, April 17, 2024 at 12:27 p.m. PT

March 23, 2024

Is Ungoogled Chromium the BEST Privacy Web Browser?

How to install Ungoogled Chromium


What is Ungoogled Chromium:

In order to understand Ungoogled Chromium, you first need to understand some basic information on the base browser, Chromium.

Chromium is the open-source engine and framework that Google Chrome is derived from; it also functions as the upstream for well-known browsers like the Brave browser.

This does not necessarily mean that Chromium is Google Chrome.

This also does not at all mean that Chromium, as it is, is a private alternative to Google Chrome.

This gap is exactly where Ungoogled Chromium steps in.

Ungoogled Chromium is what its name implies; it is Chromium stripped of its dependencies on Google web services such as "Safe Browsing" and Google Location Service.

This improves your online privacy because it completely eliminates the "phoning home" to Google servers - something that even regular Chromium does.

For example, "Safe Browsing" sends data of the sites you visit to Google to ensure that these sites are "safe." This feature sounds good, but if you follow your standard internet safety checklists, you'll be pretty good at avoiding obviously "unsafe" sites.

The privacy issue with a "Safe Browsing" web search is that Google you're feeding the G machine free information. You can bet that they are recording what sites you visit, when you visit them, how often you visit them, and etc.

Ungoogled Chromium also removes the Google (and other Big Data/Big Tech) defaults.

For example, regular Chromium sets your browser's default search engine to Google. Ungoogled Chromium's default is its "No Search" feature.

Forewarning

While Ungoogled Chromium is a solid Chromium-based browser for privacy, you should be aware that it is not without its faults, which could compromise the general user experience, such as:

Maintained by a small group of developers

Patches come out slower than for standard Chromium (NOTE: Despite this, the developers are very good at being speedy in applying released security updates to the source code)

Binaries are created by volunteers. (This is also a warning that can be found on Ungoogled Chromium's GitHub download page.)

How to install on Linux

Most Linux users also have a couple of different ways to install Ungoogled Chromium. By far the easiest method to accomplish this would be to use Flatpak.

As previously explained, Flatpak has broad support for many different Linux flavors out there. Some distros, such as Linux Mint, have Flatpak installed by default. For those that don't have Flatpak already installed, you will need to install it prior to using this method to install Ungoogled Chromium.

Once Flatpak is installed on your system, you must add the Flathub repo (assuming it has not already been added) using this command: flatpak remote-add --if-not-exists flathub https://flathub.org/repo/flathub.flatpakrepo

Now we're ready for our system to install Ungoogled Chromium: flatpak install flathub com.github.Eloston.UngoogledChromium

Linux users who do not wish to use Flatpak (depending on the distro) can use the source to build their own Ungoogled Chromium package here .

Alternatively, Linux users can also make use of the volunteer binaries for their particular distro.

When using the binaries, if your distro doesn't have a graphical interface to handle the installation for you, then you can always use the terminal to install everything.

Source: https://avoidthehack.com/how-to-install-configure-ungoogled-chromium#linux

Alternate How to get it:

For those that want to try running an Ungoogled (Google tracking removed) version of Chromium, you can download it from the Snap Store or head here for a direct download. Enjoy.

https://flathub.org/apps/com.github.Eloston.UngoogledChromium

https://ungoogled-software.github.io/ungoogled-chromium-binaries/


February 2, 2024

How to Install Firefox as DEB on Ubuntu (Not Snap)

So you want to install Mozilla Firefox as a Deb package on Ubuntu 22.04 LTS (or above), not as a snap app. 

No problem; in this guide I show you how using the official Mozilla APT repo.

Firefox is the default web browser in Ubuntu but as of 2022 it’s packaged as a snap app, with a traditional DEB version only available for users of Ubuntu 18.04 LTS and earlier.

Worse, if you uninstall the Firefox snap and run apt install firefox assuming you will get a DEB version, you won’t: that install a transition package that reinstalls the Firefox snap.

The Firefox Deb in the Ubuntu repos just reinstalls the Firefox Snap package…

Now, snap packages have plenty of pluses, including improved security, easy access to release channels, options to “undo” updates, less chance of package conflicts or missing dependencies, and more.

But there are also drawbacks to using snaps.

Depending on the software, features may not work in a sandbox; system integration may be lacking; startup times can seem slow; and you won’t be able choose whether to install an update or not, as updates happen automatically, silently in the background.

Although workarounds and fixes many of the issues above do exist (for example, Canonical has added new terminal commands to pause automatic updates for a set duration) the fact you need to scour the web for a solution is not ideal.

So to install a Firefox Deb in Ubuntu 22.04 LTS and above, here’s what you need to do.

Installing Firefox via Apt (Not Snap)

With the release of Firefox 122 in January 2024 Mozilla announced its own dedicated APT repo for Debian-based distros (including Ubuntu). This contains new, stable releases of Firefox as a DEB package.

To add the Mozilla APT repo you should use command line as it’s the most efficient way (and the way Mozilla themselves recommend). You can add the repo using a GUI but it’s a lengthy process and easier to ‘mess up’.

You will also need to ‘pin’ the Firefox Deb package after installation. This will prevent Ubuntu’s transition package from overwriting it to reinstall the Firefox snap.

Note: if you previously added the Mozilla Team PPA to install a Firefox Deb package you should disable or remove the PPA to avoid package conflicts.

Before you go ahead I suggest making a backup/export of important browser settings, bookmarks, and other data from Firefox incase something goes wrong.

When you’re done:

Step 1: Uninstall the Firefox Snap:

sudo snap remove firefox

Step 2: Create an APT keyring (if one doesn’t already exist):

sudo install -d -m 0755 /etc/apt/keyrings

Step 3: Import the Mozilla APT repo signing key (if wget is missing install it first):

wget -q https://packages.mozilla.org/apt/repo-signing-key.gpg -O- | sudo tee /etc/apt/keyrings/packages.mozilla.org.asc > /dev/null

Step 4: Add the Mozilla signing key to your sources.list:

echo "deb [signed-by=/etc/apt/keyrings/packages.mozilla.org.asc] https://packages.mozilla.org/apt mozilla main" | sudo tee -a /etc/apt/sources.list.d/mozilla.list > /dev/null

Step 5: Set the Firefox package priority to ensure Mozilla’s Deb version is always preferred. If you don’t do this the Ubuntu transition package could replace it, reinstalling the Firefox Snap:

echo '

Package: *

Pin: origin packages.mozilla.org

Pin-Priority: 1000

' | sudo tee /etc/apt/preferences.d/mozilla

Step 6: Finally, install the Firefox DEB in Ubuntu:

sudo apt update && sudo apt install firefox

Step 7 (Optional): To use a localised version of Firefox (i.e. the UI in a language other than American English) you need to install the corresponding language package, e.g., for French:

sudo apt install firefox-l10n-fr

You can see a list of all available language packs by running apt-cache search firefox-l10n.

Once you’ve installed everything open the app launcher, click the Mozilla Firefox icon to open your new non-Snap Firefox build, and away you go. Pin the icon to the Ubuntu Dock if you need to.

Sidenotes…

Keep in mind that any bugs, missing features, and missing system integrations with the Firefox snap package (like the ones affecting 3rd-party password managers) are being addressed by Ubuntu developers, so consider hanging tight for a solution.

Otherwise, roll with the Deb as detailed above.

Some of you have asked me how to replace the Firefox Snap with a Deb version (you can also download, move, and link to the Firefox binary as an alternative) but this method feels like the best solution.

Source: https://www.omgubuntu.co.uk/2022/04/how-to-install-firefox-deb-apt-ubuntu-22-04

January 31, 2024

How to Install Conky Manager 2 in Ubuntu 20.04 | Ubuntu 22.04

This simple tutorial shows how to install Conky Manager 2, the graphical front-end for Conky system monitor, in Ubuntu 20.04 and Ubuntu 22.04 LTS.

Conky is a light-weight system monitor for Linux Xorg, that displays CPU, GPU, and disk usage, network speed, weather, date and time and other information on desktop as widget.

And Conky Manager is a graphical tool that manages Conky config files. It provides options to start/stop, browse and edit Conky themes installed on the system.

The software was originally developed by by teejee2008 (Tony George), but not been updated for quite a few years. And Conky Manager 2 takes the job to make it work on recent Linux systems with updated Conky versions support.

Install Conky Manager 2 Ubuntu via PPA:

For those still using conky widget to monitor CPU/RAM, network usage, and weather information, I’ve create an unofficial PPA contains the most recent packages for Ubuntu 22.04 and Ubuntu 20.04, with both 64-bit and arm64/armhf OS types support.

1.) First, open terminal by either pressing Ctrl+Alt+T on keyboard, or searching from ‘Activities’ overview screen. When it opens, run command to add the PPA:

sudo add-apt-repository ppa:ubuntuhandbook1/conkymanager2

Type user password (no asterisk feedback) for sudo prompts and hit Enter to continue.


NOTE: Linux Mint needs to manually update cache via

sudo apt update


command first.


2.)
Then install Conky Manager2 and conky as dependency library via command:

sudo apt install conky-manager2


Start and use Conky Manager 2:

Once installed, search for and launch Conky Manager app from the activities overview screen (or from start menu depends on your DE).

The app comes with some default themes, though may not well configured for your desktop. Tick or un-tick any item in the list will start or stop conky with that theme, though you may also use the tool bar buttons.

And, you can use the “spanner” icon to config theme options, including screen location, size, background transparency. Advanced users may also click on the ‘pencil‘ icon to edit it via configuration file.

There are also tons of Conky themes on the web. You can download one, and install it easily by clicking the second folder icon (with a little emblem).

Uninstall Conky, Conky Manager:

For any reason, you can easily remove the Ubuntu PPA by running the command below in terminal:

sudo add-apt-repository --remove ppa:ubuntuhandbook1/conkymanager2

If you want to remove Conky as well as Conky manager run command:

sudo apt remove --autoremove conky conky-manager2


Source: https://ubuntuhandbook.org/index.php/2020/07/install-conky-manager-ubuntu-20-04-lts/

December 27, 2023

Install & Setup Harmattan Conky Theme in Ubuntu Desktop

Harmattan is a set of conky themes that display a desktop widget on Ubuntu desktop with information of date and time, weather forecast, network speed, and system resource usage.


For those who want to try this conky theme, here’s a step by step how to setup guide:

1. First of all, open terminal (Ctrl+Alt+T) and install conky if you don’t have it via command:

sudo apt install conky-all

2. Download the conky theme via the link below:

Download Harmattan Master

3. Extract the tarball, go into result folder and move the .harmattan-assets folder (press Ctrl+H to view hidden folders) to user’s home directory.

move to user home

Then open the result folder in terminal:

4. When the terminal opens, run the preview.sh script via command:

./preview.sh

You’ll see a desktop conky widget, now you can do:

  • press h or l to switch themes.
  • Press j or k to change formats.
  • Press n or m to switch modes.

After selected your favorite theme, press i in terminal to setup OpenWeatherMp API and your City ID.

5. Finally open terminal (Ctrl+Alt+T) and run command to edit the .conkyrc file:

gedit ~/.conkyrc

When the file opens, do:

  • Change window_type= to "override" to remove widget border.
  • Change the value of gap_x and gap_y to move widget location.

For the network connection issue, find your device name via command:

ifconfig

In my case it’s enp2s0, so in the .conkyrc file replace all enp0s1 with enp2s0 (use Search -> Find and Replace … menu).

Finally save the file and enjoy!

Source: https://ubuntuhandbook.org/index.php/2017/05/install-setup-harmattan-conky-theme-in-ubuntu-desktop/

November 22, 2023

Apply Real-Time Effects to Audio on Ubuntu with This App

Many moons ago I covered a neat audio tool called PulseEffects, which made it easy to modify the sound output of any app on a global or per-app basis.

As you may infer from the name, PulseEffects was built around and designed for PulseAudio. Most major Linux distributions have switched from PulseAudio to PipeWire for their audio handling.

Enter Easy Effects, a successor to PulseEffects that sports a modern GTK4 interface, and an expanded set of features that enable to function as a powerful audio effects processor for PipeWire applications. It offers an equalizer, limiter, and compressor (among others) and a built-in spectrum analyser.


Want a system-wide equalizer? You got one!
Thus, Easy Effects works with anything that makes sound on Ubuntu — be it videos you stream from YouTube or Amazon Prime in Firefox, sound from native applications like music players, through to the immersive soundtracks in your favourite Linux games on Steam.

You can apply equalizer adjustments to music played on Ubuntu in your favourite music player (e.g., Spotify) without affecting ALL of audio on your system. Similarly, you could apply an effect that does affect all your system audio, e.g., to unlocking richer sound from your hardware.

Effects will only affect the apps you want


In addition to sculpting sound output, Easy Effects is able to apply audio effects to sound input (e.g., microphone). This is a great way to add real-time effects to audio in a call, stream, presentation, or podcast. Or, in my case, just to amuse yourself!

Effects (usually, though they may vary by distro) available OOTB include:
  • Auto gain
  • Bass enhancer
  • Bass loudness
  • Compressor
  • Convolver
  • Crossfeed
  • Crystalizer
  • De-esser
  • Delay
  • Echo Canceller
  • Equalizer
  • Exciter
  • Filters (various)
  • Gate
  • Limiter
  • Loudness
  • Maximizer
  • Multiband compressor
  • Multiband gate
  • Noise reduction
  • Pitch
  • Reverberation
  • Speech Processor
  • Stereo tools


As well as having lots of control over each effect you’re also in control of the effects order, and you can turn off any effect at any time without removing it (and losing your modifications), and save settings to re-use at a later date.

High Quality Presets Available

Now, I am not an audio expert. I don’t really know what all the switches and sliders and effects in this app do — but thankfully, I don’t need to.

Pre-made audio presets are available to download from the developer’s EasyPulse repo. Simply download a config, load it into the app, and bam, you can instantly benefit from audio optimisations made by someone who knows what they’re doing!

Install Easy Effects on Ubuntu

You can install Easy Effects on Ubuntu direct from the repos in Ubuntu 22.10. This is recommended as it ensures the version of the app you install plays nice with the version of PipeWire on your system. Run a sudo apt install easyeffects to get it.

If you fancy fiddling with the most recent release, or on other versions of Ubuntu, you can get Easy Effects on Flathub. I tried this build on Ubuntu 22.10 and received a warning that my PipeWire version was too old to play nice with the app — I ignored this and it worked fine for me, but YMMV.

For more information check out Easy Effects on GitHub.

Source: https://www.omgubuntu.co.uk/2023/05/easy-effects-ubuntu